
I'm not sure why I don't scrap pictures of me and my hubby more often. So today, I made this layout that I dedicated to my husband, Leo.
I met my husband many many years ago. We both went to the same Middle School. We became a really good friend. He moved out of town into a boarding school for most of his High School life. We still kept in touch and hung out once in a while for a special occasion. After graduated from High School, he decided to go to The Philippine for College, and I came to the US.
In Summer 2001, I went home to Indonesia for Summer vacation. I happened to talk on the phone with him. A few days after that phone call, he told me that he's coming with me to the US, and study at the same College. I was so excited...because it was really hard {mentally} studying so far away from my family.
We became best friend to each other..and before we knew it we dated. LOL :D
We've been together for 9 years, and married for 5 years. He's my true love.
Well...enough for the love story. Let me show you the layout, and I used a sketch # 155 from Creative Scrappers.

Most of the supplies I used on this project were clearance stuff from Valentine's Day.
And this flower...

I made this using baking cups/cupcake cups. It's really simple and the result is fantastic.
Here's some instructions on how to make this flower.
Cuppy Flower {not sure what to call this flower}
Supplies : - Baking Cups/Cupcake Cups (I used 3 pieces)
- Needle and Thread
- Basic Papercrafting supply (Scissors and glue)
- Flower center (can be: Button, Pearl...anything you want)
Steps:
1. Stack 3 pieces of baking cups/cupcake cups together, and then fold them in half.
2. Cut the center.

Here's the result.

3. Do a running stitch around the circle.

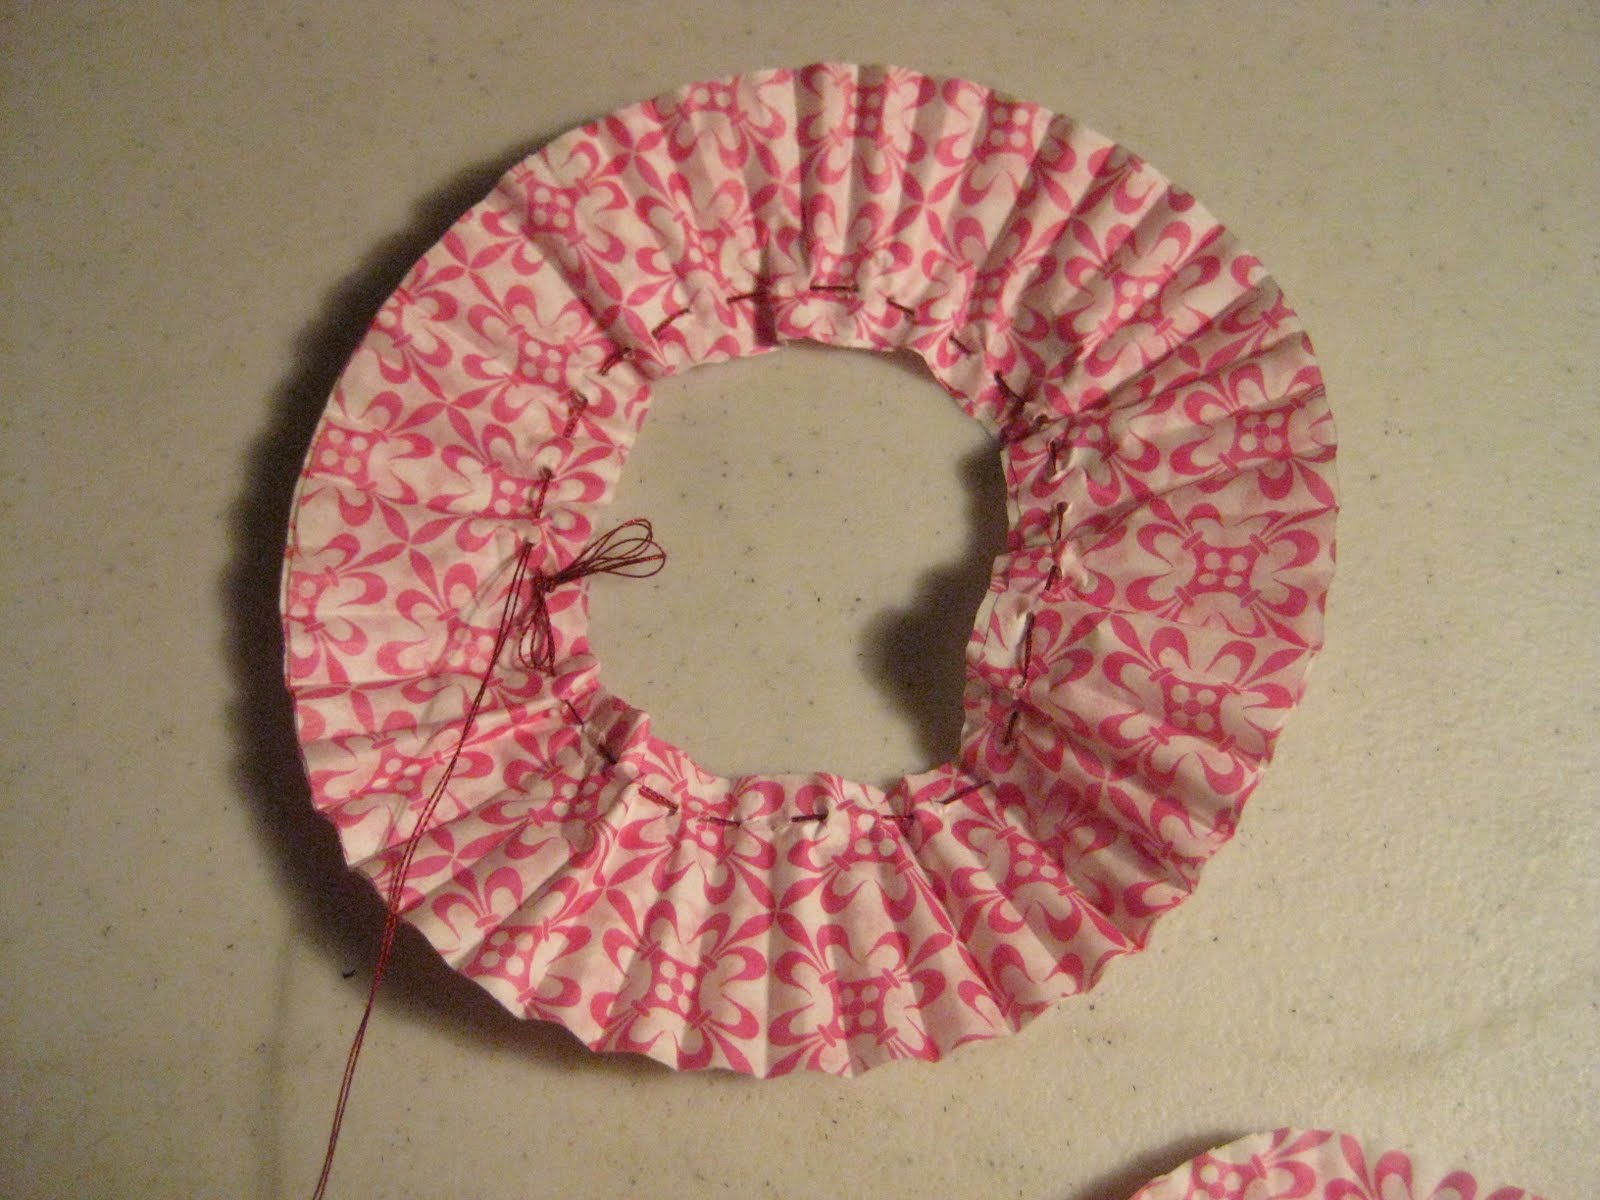
4. Pull the thread together so there's no longer a big open circle.


Sometimes, you need to stitch across so that the circle is completely close.

6. Add the center....on this case, I use button.

7. Now the last and fun part. Separate the layers. Make it fluffy.

8. Enjoy your flower!!

So, what do you think? Easy and FUN right?
With so many designs and colors of baking cups....you can create beautiful flowers for many different occasion.
Thank you so much for stopping by. Hope you enjoy this post and give the flower a try.
Happy Scrapping, and I'll see you in the AM for SP&Company DT Wednesday.
Hugs,

Tenny this layout is SO SUPER Beautiful. I love all the details that you added to it. You guys look so sweet!
ReplyDeleteHugs
Kate
your baking cup flower is soooo cute! I am going to have a try st this :)))
ReplyDeleteThis is so clever! Love the rest of the layout, too! =)
ReplyDeleteThat's really clever! Thanks for sharing!
ReplyDeleteHi Tenny, I love, love this scrapbook layout. Fabulous job. You've been so great about leaving me such lovely comments I have added you to my sidebar under the "faithful friends" heading.
ReplyDelete